I'm trying something new with student reflections this year - traffic light reflections. In the past, I've done Glow and Grow reflections (you can read a little more about that strategy HERE), and I still love love love those reflections, but with my students already familiar with our Traffic Light Comprehension Dots I decided to keep things simple for them, and changed up our reflections a bit.
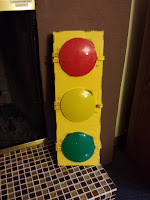
(That and I found the coolest light up traffic light at Hobby Lobby and made it a fixture in our class - it's the little things that make me happy). ;)

I'm planning on doing student-led conferences near the end of the year this year, so I wanted to make sure their portfolio pieces contained a lot of reflections they could refer back to - not only for the conferences at the end of the year, but also to drive their everyday goals.
This week we've used the traffic light reflections with our first writing piece - I just kept it very simple and made a quick template with three dots to resemble the traffic light. They colored the dots red, yellow, and green - and then had to write down something from their writing for each level of dot:
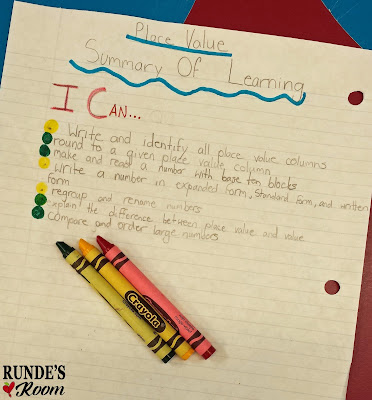
 We also used the traffic light reflection on our summary of learning at the end of our math unit this week. As part of our review before our summative, I do a "summary of learning" where they come up with and reflect on all our learning goals from the unit (this time using "I Can" instead of "I Will" because it's the end of the unit). I did a class anchor chart, and students copied this into their own notes. I then asked them to individually reflect on those goals - putting a traffic light dot beside each goal, depending on their level of comfort with the goal. I reminded them to let this help drive their studying and review for the test - spending more time on concepts they felt were a yellow or red.
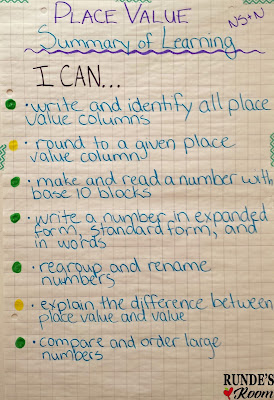
 We also reflected as a whole group - asking everyone how they felt about a specific goal, and taking a vote for the traffic light reflection dot for each goal. This was done on our anchor chart. This gives me a great insight into which areas to do a little more review on before the summative, and I can see who to quickly pull for a little small group practice. I usually get asked, "Do students really want to admit they don't understand and put down a red dot on their paper, or raise their hand for a red dot?" And my answer is YES. I've done traffic light comprehension dots (and now reflection dots) for 4 years now, and my students have always been willing to admit where they need a little extra help without any apprehension or embarrassment at all. And I am so thankful for that. And so are they - knowing it's one way of letting me know they need a little extra something from me.
6
(That and I found the coolest light up traffic light at Hobby Lobby and made it a fixture in our class - it's the little things that make me happy). ;)

I'm planning on doing student-led conferences near the end of the year this year, so I wanted to make sure their portfolio pieces contained a lot of reflections they could refer back to - not only for the conferences at the end of the year, but also to drive their everyday goals.
This week we've used the traffic light reflections with our first writing piece - I just kept it very simple and made a quick template with three dots to resemble the traffic light. They colored the dots red, yellow, and green - and then had to write down something from their writing for each level of dot:
- red shows an area where they know they need to improve
- yellow shows an area where they are working on and improving in ... but can continue to work on
- green shows their strengths - something they are really proud of
They also used the red, yellow, and green to mark their own writing and show where the areas were in their writing. When finished, the reflection sheet was stapled to the back of their writing, and placed in their portfolios.
 We also used the traffic light reflection on our summary of learning at the end of our math unit this week. As part of our review before our summative, I do a "summary of learning" where they come up with and reflect on all our learning goals from the unit (this time using "I Can" instead of "I Will" because it's the end of the unit). I did a class anchor chart, and students copied this into their own notes. I then asked them to individually reflect on those goals - putting a traffic light dot beside each goal, depending on their level of comfort with the goal. I reminded them to let this help drive their studying and review for the test - spending more time on concepts they felt were a yellow or red.
 We also reflected as a whole group - asking everyone how they felt about a specific goal, and taking a vote for the traffic light reflection dot for each goal. This was done on our anchor chart. This gives me a great insight into which areas to do a little more review on before the summative, and I can see who to quickly pull for a little small group practice. I usually get asked, "Do students really want to admit they don't understand and put down a red dot on their paper, or raise their hand for a red dot?" And my answer is YES. I've done traffic light comprehension dots (and now reflection dots) for 4 years now, and my students have always been willing to admit where they need a little extra help without any apprehension or embarrassment at all. And I am so thankful for that. And so are they - knowing it's one way of letting me know they need a little extra something from me.
Happy Wednesday!


